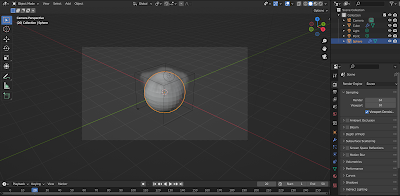
Goal: Today, you'll learn how to create realistic smoke
effects in Blender using the smoke simulation system. This is a great way to
simulate environments like industrial settings, campfires, or even volcanic
eruptions.
Task Overview:
- Set up a
simple scene.
- Use
Blender’s volume effects to create smoke.
- Tweak the
smoke settings to get the desired look.
- Render a
shareable visual of a realistic smoke simulation.
Step-by-Step Tutorial:
1. Open Blender
- Open
Blender and start a new project.
2. Set Up the Scene
- Delete the default cube (Select the cube and
press
Xto delete). - Add a new object that will emit the smoke:
- Go
to the
Addmenu at the top or pressShift + A, then selectMesh>Sphere(you can use any object, but we’ll use a sphere for this tutorial).
3. Add a Smoke Simulation
- Convert the sphere to a smoke emitter:
- With
the sphere selected, go to the
Physicstab on the right panel. - Click
on
Fluid, and from the drop-down, selectSmoke. - In
the
Smoke Type, selectFlow. This tells Blender that the sphere will emit smoke.
4. Adjust Smoke Settings
- In the
Flow Type, ensure it is set toSmoke. - You can
tweak additional settings here:
- Temperature: This affects how fast the smoke
rises (default is fine for now).
- Density: Adjust to control how thick or light
the smoke appears (default is good for basic smoke).
5. Add a Domain Object
- Smoke
simulations in Blender require a domain
to contain the smoke.
- Add a cube (
Shift + A>Mesh>Cube) and scale it up (Skey) so that it surrounds the sphere completely. - With
the cube selected, go to the
Physicstab and enableFluid>Smoke. This time, set theSmoke TypetoDomain.
6. Preview the Simulation
- Press Play (
Spacebar) to start the animation. You should see smoke start to emit from the sphere and fill the domain. - Tip: If the smoke appears too slow or fast,
you can adjust the simulation time in the
Domainsettings underTime Scale.
7. Refine the Smoke Look
- To make
the smoke look more realistic, you can go to the
Shadingworkspace (at the top of Blender). - Select
the
Render Propertiestab and switch theRender Engineto Cycles for better results. - Under
the
Domainobject's material settings, ensure you are using the Volume Scatter shader for more realistic smoke rendering.
8. Adjust the Lighting
- For
realistic smoke, you need good lighting:
- Add a light source (
Shift + A>Light>SunorArealight). - Position
the light to highlight the smoke.
9. Render the Simulation
- Set up a
camera to capture the smoke effect. You can add a camera by pressing
Shift + A>Camera, then position it usingGandRto adjust. - Go to the
Rendertab and click on Render Image or Render Animation if you want to render an animated sequence of the smoke.
10. Export and Share
- Once the
render is complete, save the image (
F3to save). - For
animations, export the video as a
.mp4file to share.
Shareable Visual:
- You now
have a realistic smoke effect animation or still image ready to share.
This could be a simple puff of smoke, an ongoing smoke cloud, or something
more dynamic depending on how you adjusted the simulation.
This lesson helps you get familiar with Blender’s volume effects
and provides you with a solid understanding of how to create smoke. This
fundamental skill can be applied to larger VFX projects like fires, explosions,
or even misty environments!
Source:
ChatGPT


.jpg)


